Vizy already supports plenty of nodes to model your content, but you can already create your own!
We'll cover creating a new node to insert an Emoji into the editor content.
Heads up! This guide requires that you're familiar with Tiptap (opens new window) and creating custom extensions. We'll cover all the details for Vizy, but not cover the specifics of Tiptap or ProseMirror (opens new window) work.
This guide will give you an excellent starting point to continue developing your own.
Understanding Vizy Plugin anatomy
Before we dive in, let's discuss the anatomy of a Vizy Plugin, which ties into a little bit about how Tiptap (opens new window) works. There's a few concepts to grasp, but we'll try and cover them as required, step-by-step.
In our case, we want to register a new button that when pressed, adds an emoji to the content. That requires three parts:
- A Tiptap (opens new window) extension to add the new node definition to the editor
- A button, that when pressed performs the actual action
- A PHP class that handles the emoji saved in ProseMirror schema to output on the front-end
In order to construct a document model, Tiptap (and ProseMirror) needs to know all the pieces you're trying to add to it. This is called a "schema". For example, you might have a button that bolds text when clicked, but Tiptap needs to know how to do that to the text.
As such, we'll be creating a Tiptap extension in the form of a custom node that generates a DOM element in the editor to show our emoji. Once added to the Vizy field, Tiptap will be able to understand what an emoji node is, what it looks like, how to create one, and more.
The second part is more on the Vizy end (as Tiptap is renderless), where we need to register a button in the toolbar. If the extension is adding the instructions to the editor on what to do, a button is the action to actually do it.
The third part is in PHP, once the emoji has been saved as JSON to the database. Like in the editor itself, we use a schema when rendering the content of the field on the front-end, which is largely structured according to ProseMirror. But the schema won't know how to handle our custom emoji node, so we'll need to give it instructions on how we want to render that node.
Create your module
First, you'll need to get familiar with creating a module, as we'll be registering our custom files through a module.
When creating your module, set the namespace to modules\vizymodule and the module ID to vizy-module.
Create the following directory and file structure:
my-project/
├── config/
│    └── vizy/
│            └── Custom.json
├── modules/
│    └── vizymodule/
│        └── src/
│            └── assets/
│                └── js/
│                    └── emoji.js
│                └── EmojiAsset.php
│            └── nodes/
│                └── Emoji.php
│            └── VizyModule.php
└── ...
// modules/vizymodule/src/VizyModule.php
<?php
namespace modules\vizymodule;
use Craft;
use modules\vizymodule\assets\EmojiAsset;
use modules\vizymodule\nodes\Emoji;
use verbb\vizy\base\Plugin as VizyPlugin;
use verbb\vizy\events\RegisterNodesEvent;
use verbb\vizy\events\RegisterPluginEvent;
use verbb\vizy\fields\VizyField;
use verbb\vizy\services\Nodes;
use yii\base\Event;
use yii\base\Module;
class VizyModule extends Module
{
// Public Methods
// =========================================================================
public function init()
{
// Call the `Module::init()` method, which will do its own initializations
parent::init();
// Define a custom alias named after the namespace
Craft::setAlias('@vizy-module', __DIR__);
// Register our custom plugin
Event::on(VizyField::class, VizyField::EVENT_REGISTER_PLUGINS, function(RegisterPluginEvent $event) {
$event->plugins[] = new VizyPlugin([
'handle' => 'emoji',
'assetBundle' => EmojiAsset::class,
]);
});
// Register our custom node
Event::on(Nodes::class, Nodes::EVENT_REGISTER_NODES, function(RegisterNodesEvent $event) {
$event->nodes[] = Emoji::class;
});
}
}Here our main module file is pretty simple. We tell Vizy we want to register a new VizyPlugin with the handle emoji, and provide it the asset bundle EmojiAsset.
You can name the handle whatever you like, so long as it's unique for any other Vizy Plugin registered. It'll be this value that we'll use in our editor config to enable the plugin.
Lastly, we register an Emoji class for our custom node. This will be for us to define what to do with an emoji node when rendering the content of the Vizy field on the front-end.
Asset Bundle class
// modules/vizymodule/src/assets/EmojiAsset.php

<?php
namespace modules\vizymodule\assets;

use craft\web\AssetBundle;
use craft\web\assets\cp\CpAsset;
use verbb\vizy\web\assets\field\VizyAsset;

class EmojiAsset extends AssetBundle
{
    // Public Methods
    // =========================================================================

    public function init(): void
    {
        $this->sourcePath = '@vizy-module/assets';

        $this->depends = [
            CpAsset::class,
            VizyAsset::class,
        ];

        $this->js = [
            'js/emoji.js',
        ];

        parent::init();
    }
}
For our asset bundle, we register any CSS or JS that we'll need for our plugin. These can be named whatever you like. We also ensure that this asset bundle is dependant on CpAsset and VizyAsset to ensure things are loaded correctly.
Editor Config
Before we dive into the JS code, let's add this newly-registered plugin to our editor config. This allows us to actually load the plugin on a Vizy field that uses this editor config.
// config/vizy/Custom.json

{
    "buttons": ["italic", "bold", "emoji"],
    "plugins": ["emoji"]
}
We ensure that our plugin handle exists in the plugins array, and because we're going to register a new button, we'll add a emoji to the buttons array. Note that despite being named the same, these are two different things and don't have to be named the same.
Once you've created this file, ensure that the Vizy field you'll be testing with is using this config, by editing the settings of the Vizy field.
Emoji JS
Next, we need to create our JavaScript file that will be run when Vizy is initialized. It'll be this code that registers our Tiptap (opens new window) node.
// modules/vizymodule/src/assets/js/emoji.js

document.addEventListener('onVizyConfigReady', (e) => {
    const { Node, mergeAttributes } = Craft.Vizy.Config.tiptap.core;

    const Emoji = Node.create({
        name: 'emoji',
        group: 'inline',
        inline: true,
        atom: true,
        draggable: true,
        content: 'text*',

        addOptions() {
            return {
                HTMLAttributes: {},
            }
        },

        addAttributes() {
            return {
                emoji: {
                    default: null,
                },
            }
        },

        parseHTML() {
            return [
                { tag: 'span[emoji]' },
            ]
        },

        renderHTML({ HTMLAttributes }) {
            return ['span', mergeAttributes(this.options.HTMLAttributes, HTMLAttributes), HTMLAttributes.emoji]
        },

        addCommands() {
            return {
                addEmoji: emoji => ({ commands }) => {
                    return commands.insertContent({
                        type: this.type.name,
                        attrs: {
                            emoji,
                        },
                    });
                },
            }
        },
    });

    Craft.Vizy.Config.registerExtensions((extensions) => {
        return [
            Emoji,
        ];
    });

    Craft.Vizy.Config.registerButtons((buttons) => {
        return [{
            name: 'emoji',
            svg: '<svg xmlns="http://www.w3.org/2000/svg" viewBox="0 0 512 512"><path d="M464 256A208 208 0 1 0 48 256a208 208 0 1 0 416 0zM0 256a256 256 0 1 1 512 0A256 256 0 1 1 0 256zm192-32V200c0-2-.1-3.9-.4-5.8c-4.2 3.6-9.6 5.8-15.6 5.8c-13.3 0-24-10.7-24-24c0-6 2.2-11.4 5.8-15.6c-1.9-.3-3.8-.4-5.8-.4c-22.1 0-40 17.9-40 40v24h80zm-40-96c39.8 0 72 32.2 72 72v24c0 17.7-14.3 32-32 32H112c-17.7 0-32-14.3-32-32V200c0-39.8 32.2-72 72-72zm216 72c-13.3 0-24-10.7-24-24c0-5.4 1.8-10.3 4.7-14.3c-4.1-1.1-8.3-1.7-12.7-1.7c-26.5 0-48 21.5-48 48v16h96V208c0-4.4-.6-8.7-1.7-12.7c-4 3-8.9 4.7-14.3 4.7zm-32-72c44.2 0 80 35.8 80 80v17.9c0 16.6-13.5 30.1-30.1 30.1H286.1c-16.6 0-30.1-13.5-30.1-30.1V208c0-44.2 35.8-80 80-80zM100.4 307.8c-2.3-10.2 5.5-19.8 15.9-19.8h0H395.7h0c10.4 0 18.1 9.6 15.9 19.8c-3.9 17.4-10.6 33.6-19.5 48.2l0 0c-28.2 45.9-78.9 75.6-134.9 76l-1.1 0c-4.6 0-9.3-.2-13.8-.6c-68.5-5.9-126.7-55.6-141.8-123.6zm263.8 32.4c-8.2-2.7-16.9-4.2-25.9-4.2c-39.2 0-71.9 27.3-80.2 64c44.1-.7 83.8-24.1 106.2-59.8z"/></svg>',
            title: Craft.t('vizy', 'Emoji'),
            action: (editor) => { return editor.chain().focus().addEmoji('🔥').run(); },
            isActive: (editor) => { return editor.isActive('emoji'); },
        }];
    });
});
Let's cover this code a step at a time.
Calling document.addEventListener('onVizyConfigReady') will ensure that our code is only run when Vizy is ready to load our plugin code.
We can then access the Tiptap API without having to run npm install @tiptap/core. This is where we get our Node class definition to create a new one.
Next, we define our Node class. We won't cover all the details here, but this follows the structure of a Tiptap Node (opens new window).
We then register this new node with Craft.Vizy.Config.registerExtensions() to let Vizy load up this node definition in the editor.
Finally, we need a button to be able to trigger our new extension! We can add a new button with Craft.Vizy.Config.registerButtons() which has an action to run the addEmoji() command defined in our node class. We're also using the name we've added to our buttons array in our editor config.
Be sure to check out the Extending Vizy docs for more detail on the available options.
With all those pieces in place, let's load up the Vizy field in an entry. You should see your new button in the toolbar, ready to get pressed. Go ahead, press it!
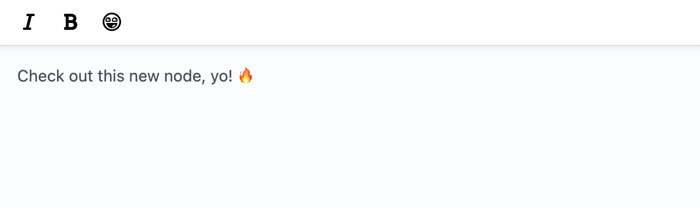
That's looking good, hope you're ready to take your content to the next level!
Inspecting the code in the editor, you'll see the following:
<p>Check out this new node, yo! <span emoji="🔥">🔥</span></p>It's created a <span> element with the emoji as the text, and as an emoji attribute. More on that later.
However, saving your entry and viewing it on the front-end, you'll notice that your shiny new emoji is missing 🙁 Or worse, you might even get an error saying that a Vizy field can't contain an emoji! That's because Vizy doesn't know how to handle that content in the ProseMirror schema — that's the JSON content saved to your database.
So — we need to tell Vizy how to handle this new node with a custom PHP class.
Node class
// modules/vizymodule/src/nodes/Emoji.php

<?php
namespace modules\vizymodule\nodes;

use verbb\vizy\base\Node;

use Craft;
use craft\base\ElementInterface;
use craft\helpers\ArrayHelper;

use LitEmoji\LitEmoji;

class Emoji extends Node
{
    // Properties
    // =========================================================================

    public static ?string $type = 'emoji';
    public mixed $tagName = 'span';


    // Public Methods
    // =========================================================================

    public function getTag(): array
    {
        $this->text = ArrayHelper::remove($this->attrs, 'emoji');

        return parent::getTag();
    }

    public function serializeValue(ElementInterface $element = null): ?array
    {
        $value = parent::serializeValue($element);

        $emoji = $value['attrs']['emoji'] ?? '';
        $emoji = LitEmoji::unicodeToShortcode($emoji);
        $value['attrs']['emoji'] = $emoji;

        return $value;
    }

    public function normalizeValue(?ElementInterface $element = null): ?array
    {
        $value = parent::normalizeValue($element);

        $emoji = $value['attrs']['emoji'] ?? '';
        $emoji = LitEmoji::shortcodeToUnicode($emoji);
        $value['attrs']['emoji'] = $emoji;

        return $value;
    }
}
Now, to throw a spanner in the works, saving multi-byte strings like emoji's to MySQL databases isn't universally supported. As such, we need to convert the nice-looking emoji to a unicode character before saving the value to the database, and swap it out again when rendering it.
Fortunately, Craft uses the LitEmoji package, which we use in serializeValue() and normalizeValue() to handle before saving and before rendering, respectively.
With that side-track out of the way, the rest of the class is very simple. We ensure the type property matches the name we've given the node in our JS class, along with tagName. We also use getTag() to control how exactly we want to render the emoji.
Remember how the <span> element also had an emoji attribute in the Vizy field? All the attributes used on the node we define in our renderHTML() function get saved to the attrs property of a node for us to access.
So if we omitted the getTag() function above, we'd get:
<p>Check out this new node, yo! <span emoji="🔥">🔥</span></p>Which is sort of okay, but it's not exactly valid HTML. Instead, our getTag() removes the emoji from $this->attrs and uses it as $this->text, rendering:
<p>Check out this new node, yo! <span>🔥</span></p>Which is more like it. But what about ditching the <span> altogether? That's fine too! Just remove public mixed $tagName = 'span';:
<p>Check out this new node, yo! 🔥</p>And that's how we can use a custom node 🔥.