Usage
You'll need to have a Xero account and create an OAuth 2.0 Xero App. You can view Xero's getting started guide (opens new window) for details on this.
Once your Xero app has been created, enter the Client ID and Secret from your Xero app in Xero's plugin settings.
Connecting an Organisation
Navigate to Organisations to create an Organisation, and save it. Click the Connect button, and proceed to authorise with Xero, selecting the organisation you wish to link in Xero.
Create multiple organisations as required, every enabled organisation will be used to send data to.
Organisation Settings
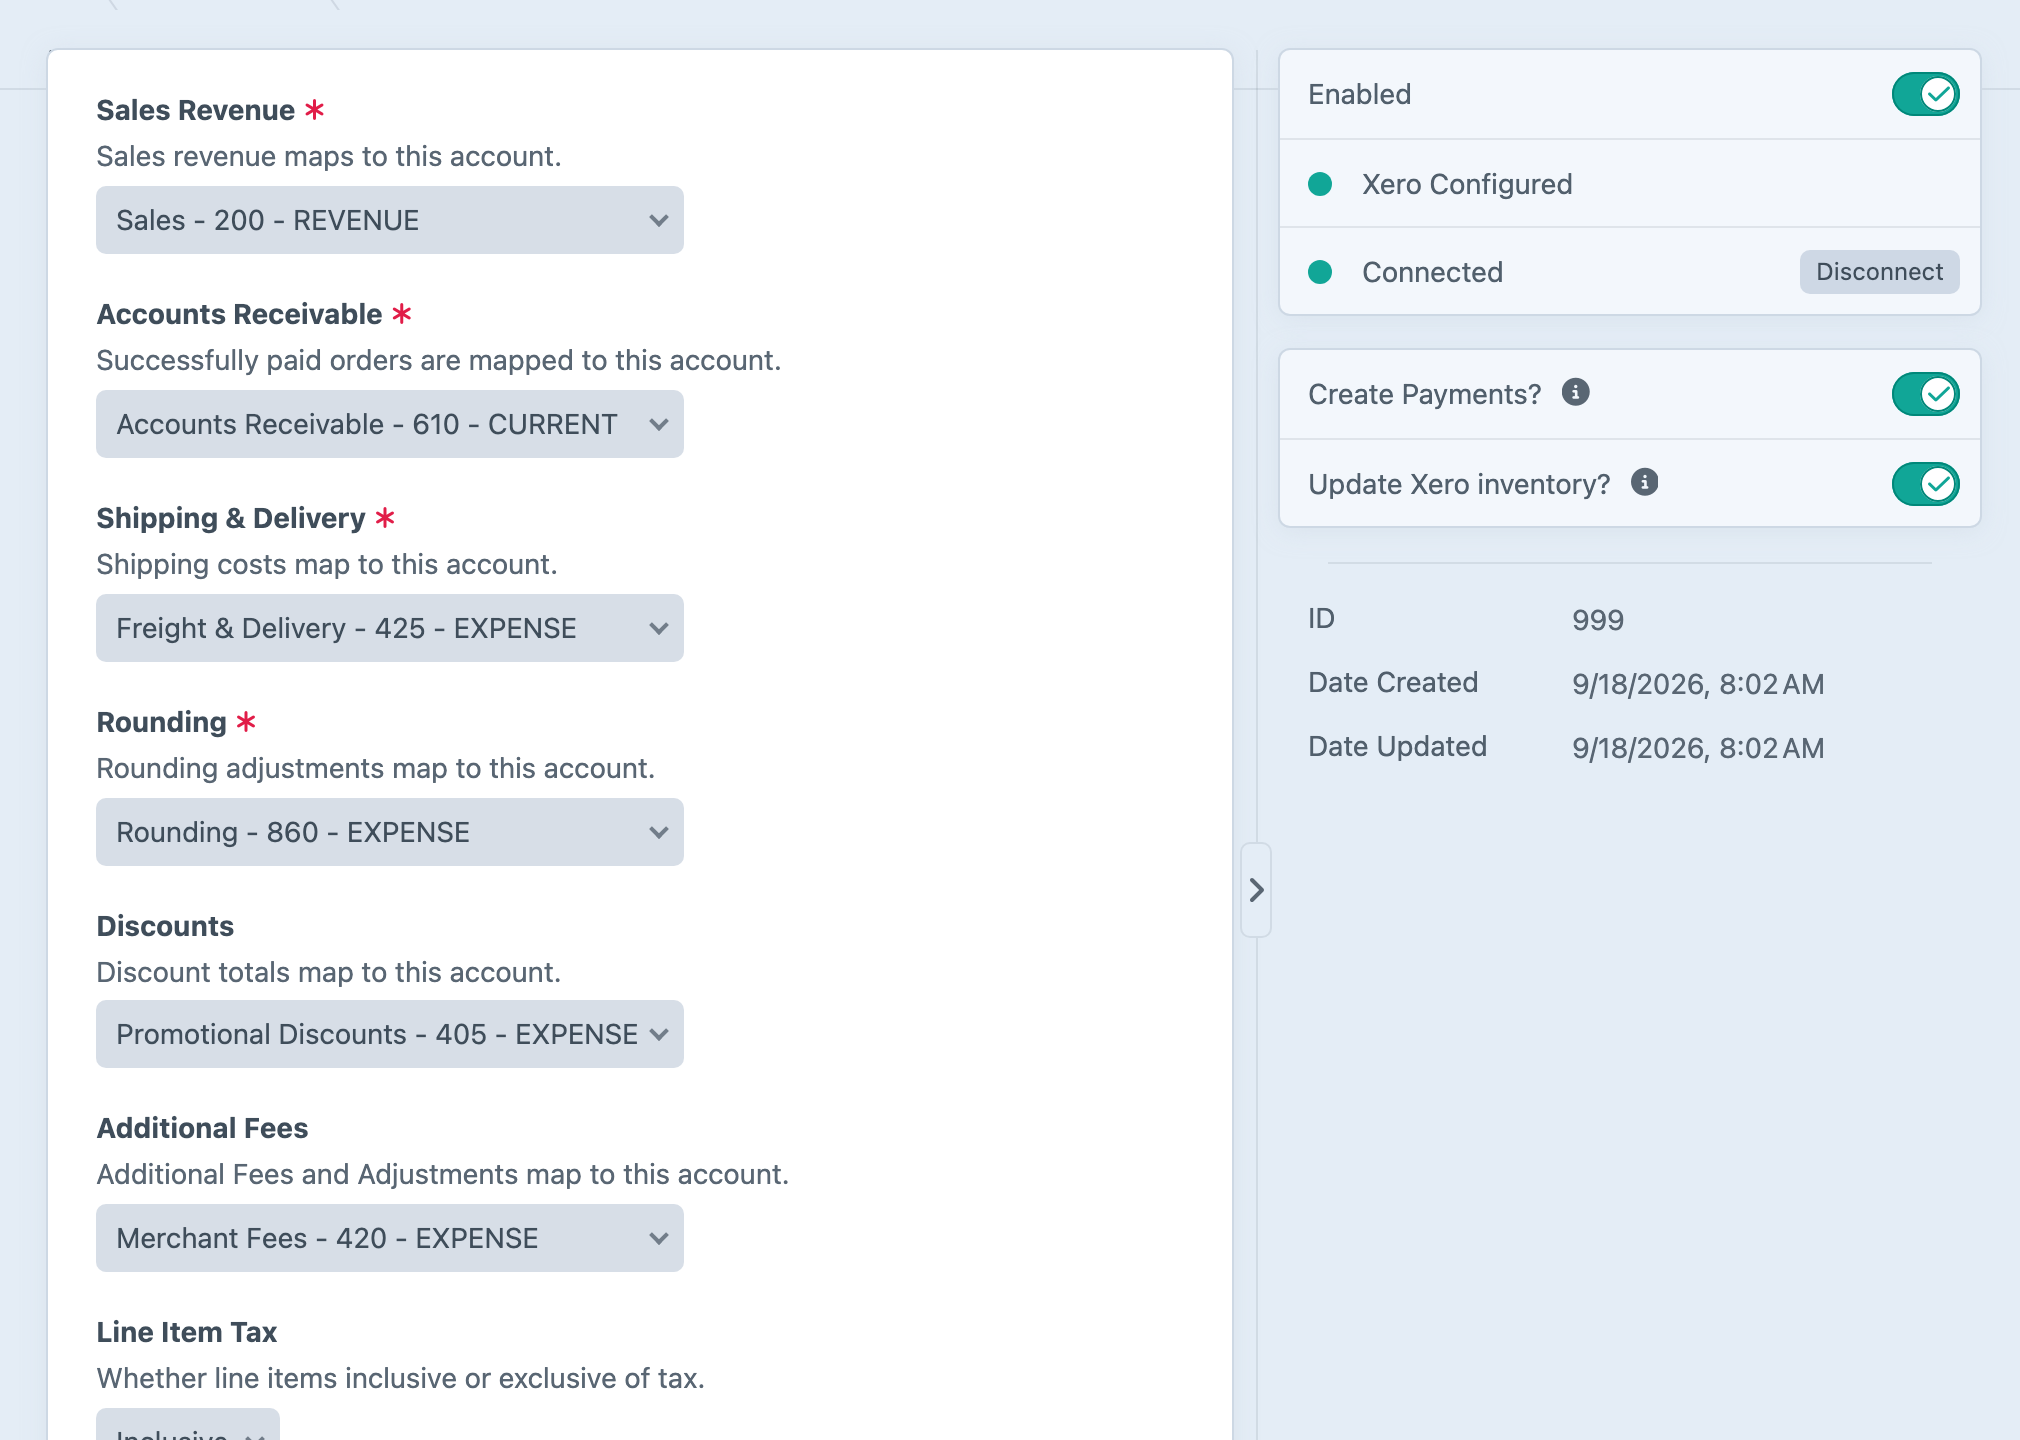
Once an organisation is connected the plugin allows you to map your Chart of Accounts (Account Codes) including:
- Sales Revenue
- Accounts Receivable
- Shipping/Delivery
- Rounding
By default, all fully paid orders will be pushed into the Craft Queue with a delay of 30 seconds, after which the invoice will be sent to Xero.
You can exclude orders paid with specific payment gateways via Settings → Excluded Gateways, or by setting excludedGateways in your config file. For more custom filtering, use the beforeSendOrder event.
You can also send existing orders to Xero when editing an order, and clicking the Send to Xero button.
Check an Invoice
Connect the intended organisation and finish the account-code mappings before sending an order. Use a test order whose totals you can recognise, then send it from the order screen or let a fully paid order trigger the queued job. Allow for the delay and ensure Craft's queue is running.
In Xero, find the resulting invoice and compare its customer, line items, shipping, tax and total with the Commerce order. Check every enabled organisation: each receives data, so enabling several organisations does not choose one automatically. If a job fails, inspect its error and the connection and account mappings before retrying. Check whether an invoice already exists before manually sending the same order again.