
After 4 months of beta testing and development, we're pleased to announce Formie 2 (opens new window) for Craft 4. This brings some great new features that we've been wanting to ship for some time, and of course means that you can use Formie on Craft 4.
Looking to dive right in? Hit the Upgrading from v1 guide to get started with the changes.
Breaking Changes
Do you want the good news, or the bad news first? Bad news is always better first. �
Because we required a new major version for Formie to split development with Craft 3 and Craft 4, it's the perfect time to fit in any breaking changes we've needed to do. They're never fun, nor pretty, but it's essential to keep our code base modern, making use of Craft 4/PHP 8 changes, and keeping legacy code to a minimum.
Most of the changes are around front-end templates, custom integrations and custom fields. If you've been using template overrides or custom templates, you'll want to get up to speed with changes.
Fortunately, we've also tried to keep things as backward-compatible as possible. We've put a handy upgrade guide together that outlines all the breaking changes.
Payments
Onto the good news! We've introduced a new field type — Payment.
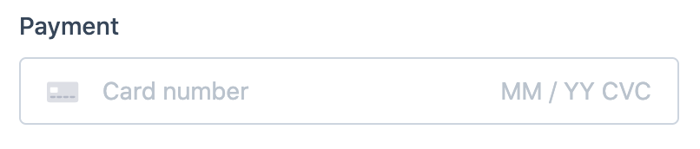
It's the perfect fit for if you want to charge users when filling out a form. You could be charging for a service, asking for a deposit — even paying for an invoice. Anything that requires a paywall.
Formie supports Stripe (one-time and subscriptions) and PayPal (one-time).
And you can of course create your own custom payment integration or chat to us.
Saving
We've added a new button for front-end forms, allowing you to save the progress of a submission for a particular page to come back later. Validation isn't triggered for this save event, which makes it pretty similar to a draft.

Templates
Speaking of the front-end for forms, the largest, most ambitious feature for Formie 2 has been a re-thought and re-architected front-end templating system.
The story so far
While Formie ships with it's own opinionated HTML, CSS and JS to make spinning up forms a breeze, it's super-important to be able to customise when you need to. Formie has always allowed that through template overrides, custom rendering and CSS variables — all of which aren't going away.
While writing your own Twig templates gives you total control over the output of a form, it comes with the cost of maintaining them. If something on Formie's end changes, you'll be required to update your custom templates with those changes.
What's more, it's next to impossible to use utility CSS frameworks like Tailwind (opens new window) or even Bootstrap (opens new window) which rely on custom HTML markup to render the forms. If you want to integrate with these, you'd be required to maintain the entirety of Formie's form, page, and field templates.
It'd also be a lot of work for us maintaining templates for each CSS framework out there, so we came up with (hopefully) a better solution.
Theme config
We wanted to provide a flexible way to control the output of the form render, from the <form> element itself, to the pages, rows, fields, buttons and more. This had to cover:
- The HTML tag used
- The HTML attributes (including, but not limited to
classattributes) - The ability to reset anything Formie does by default.
- The ability to remove HTML elements altogether (for things like wrapper
<div>elements). - Work well not only for you the user of Formie, but something we can use for default templates.
- Being able to define these in multiple ways, for all developer levels (i.e. not just PHP).
This mechanism is called Theme Config.
What theme config boils down to, is a config object that defines the HTML tag and attributes each component of a form uses when it renders.
Let's take a look at some examples.
Add an ID to the form
A common scenario is adding a id attribute to the <form> element. We can do that, no sweat! 💪
{{ craft.formie.renderForm('contactForm', {
    themeConfig: {
        form: {
            attributes: {
                id: 'my-form',
            },
        },
    },
}) }}

{# Rendering #}
<form id="my-form" class="fui-form">
Here, you can see we pass in a themeConfig object at render-time, with some settings. We're just adding the id attribute, but there's lots more we can do.
Customise buttons
Another common task is to style the submit button to match your primary button style for the rest of your site. You've now got easy access to this.
{# Before theme config #}
<div class="fui-btn-wrapper fui-btn-left">
    <div class="fui-btn-container">
        <button type="submit" class="fui-btn fui-prev" data-submit-action="back">Back</button>
        <button type="submit" class="fui-btn fui-submit fui-next" data-submit-action="submit">Submit</button>
    </div>
</div>

{{ craft.formie.renderForm('contactForm', {
    themeConfig: {
        buttonWrapper: false,
        buttonContainer: false,

        backButton: {
            resetClass: true,
            tag: 'a',
            attributes: {
                class: 'btn-secondary',
            },
        },

        submitButton: {
            resetClass: true,
            attributes: {
                class: 'btn-primary',
                type: false,
                'data-form-submit-btn': true,
            },
        },
    },
}) }}

{# Rendering #}
<a class="btn-secondary" data-submit-action="back">Back</a>
<button type="submit" class="btn-primary" data-submit-action="submit" data-form-submit-btn>Submit</button>
We've done a few things here:
- We've completely stripped out the two wrapper
<div>elements by returningfalse. These simply don't render anymore. - We're using
resetClassto remove the default Formie classes on the buttons likefui-btnwhich we might not need. - We've changed the HTML tag on the button.
- We're adding more than just classes with other attributes.
All without touching a custom template!
Advanced usage
You can also get really tricky, by including Twig templating in-context with the form component.
Let's say we want to add a class when there's errors for a field, or adding a class depending on the value of a field method.
{{ craft.formie.renderForm('contactForm', {
    themeConfig: {
        field: {
            attributes: {
                class: [
                    'my-field',
                    "{{ (submission.getErrors(field.handle) ?? null) ? 'has-errors' }}",
                    "{{ field.isHidden() ? 'is-hidden' : 'is-visible' }}",
                ],
            },
        },
    },
}) }}
Multi-method
Theme config can be defined in multiple ways, from usage in Twig with craft.formie.renderForm() to events in your PHP module, to in your config/formie.php plugin config file. The latter being mighty handy setting up defaults that are carried across from project to project.
Ready-Made Configs
We've put together a few full-featured and drop-in theme config's for you to use in your forms. Each example completely removes Formie's default fui-* classes. You're welcome to use them as-is, or modify them for your next project.
This just scrapes the surface of theme config. Continue reading up on theme config.
Finishing up
The above covers just the big-ticket items, with over 27 new features and 48 changes, there's plenty we haven't covered. You can view everything in full detail via the changelog (opens new window).
We've had to re-jig our milestones from our last post, and now our focus will be on 2.0.x (opens new window) and 2.1 (opens new window), covering at least 90 feature requests. Keep 'em coming! 🤟
Formie 1.x will continue to exist for Craft 3, but our main focus and new features will be in Formie 2.x, much like our other plugins.